Showing posts with label Recipe. Show all posts
Wednesday, October 31, 2012

Butternut Squash and Chicken Soup

Since we are getting into cooler weathers, and this whole Sandy business has made me aching for some home style goodness, I thought I would share a super simple recipe to take the cold out of your bones. This really just reminds me of home because it was one of those meals that everyone in the house loved. It is the season of the squash so you really couldn't get any better. Let's get started shall we!

So for this soup, you will need:

1 butternut squash (I would get the straightest looking squash available just so it's easier to peel and cut)
As many Bone-in, Skin-on Chicken thighs you want (I used a package of 4)
At least 1 yellow onion (you can add more if you want)
Chicken Stock
Salt, Pepper, and Olive Oil
DSC00069

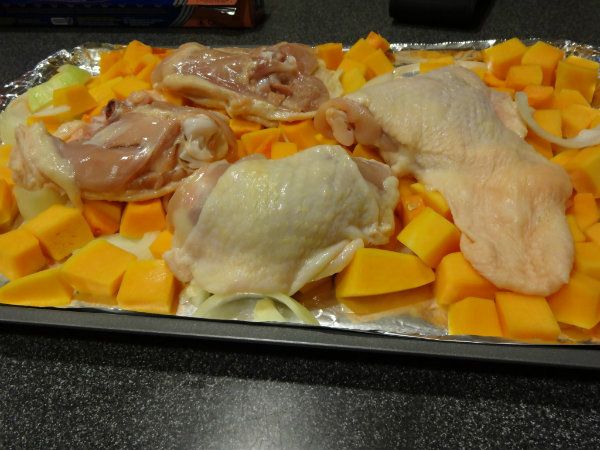
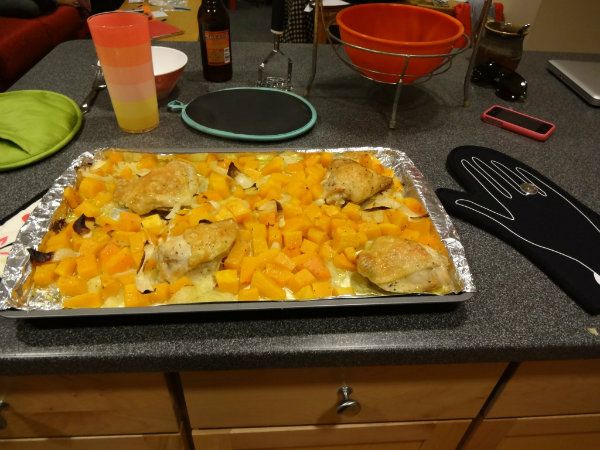
That's all that's in it! The hardest thing is actually cutting through the squash. You just want to make sure you peel the skin off, take the seeds and gunk out of the middle bit, and dice the rest of the squash. There are youtube videos of this, but you can probably figure it out. Be warned that butternut squash is one of the hardest vegetables out there, so it will require a little man power. Add this to a cookie sheet (or jelly roll pan if you're fancy). I lined mine with foil just to help with cleanup. Then clean your chicken and season with healthy amounts of salt and pepper. Place those on the sheet and toss everything in olive oil. I then added a sliced onion near the end and mixed everything together to add a different texture and flavor to the soup. Then place your pan of seasoned butternut squash, chicken,and onions in the oven at 425 degrees for about 30 minutes. I ended up putting it in for longer because I wanted to make sure the squash was roasted enough. As long as everything remains golden and not burnt (but you can take burnt pieces out later), you're safe.
DSC00072

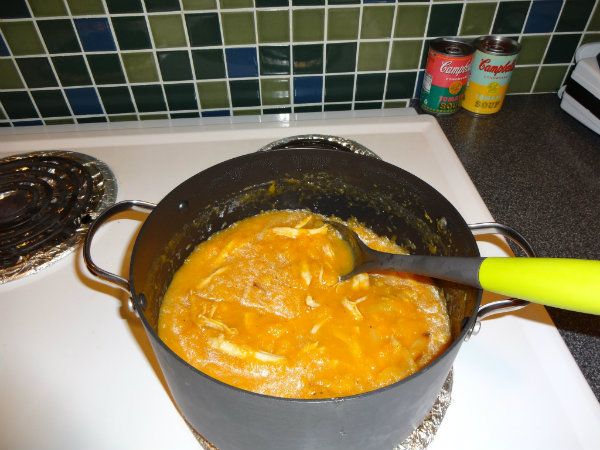
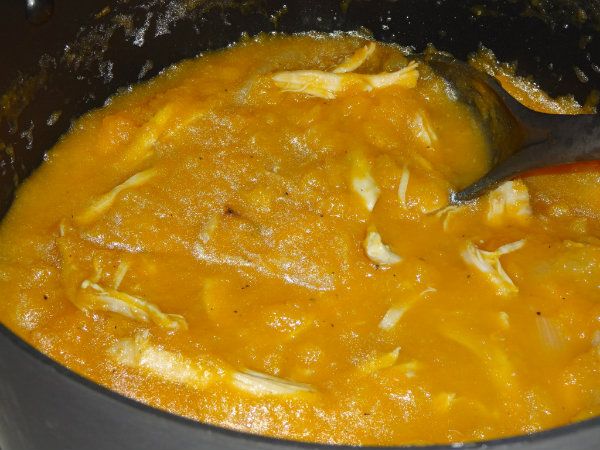
Once out of the oven, transfer all of your yummy-smelling pieces of squash and onion into either a large stock pot or pasta pot. I got a potato masher and just went to town on the squash. Add a bit of chicken stock at a time until you start to get a thicker soup mixture. It's really up to you if you would prefer a puree or a soup. I think I added about half of a carton of stock to my entire mixture. I also added some water just to thin it out even more without adding more sodium. It really is a personal preference. I've had this both thick and thin and it was delicious nonetheless. Once you get your soup base, head over to your chicken and start tearing pieces of meat off and adding it to the soup. I would probably not add the skin, but to each his own. Again, you have control over the size of chicken pieces you want.
DSC00073

And voila!!! you now have a fairly inexpensive soup that will last you at least a week in leftovers. This can also be frozen and eaten at a later day. This isn't a "real" recipe and I kind of just made it up based on what I remember from home. All I know is that it was delicious and tasted even better a few days after since all of the flavors could meld together better. So let me know if you try it and let me know what you think. Also if you have any questions I will happily answer them. Hope everyone enjoys and stay warm out there.
DSC00074
Friday, March 16, 2012

Eggs Bloomsbury


So I'm a college student studying abroad in London for a semester. You might be asking: Carly, what do you eat? Going out over here is wicked expensive, and it just doesn't make sense to me to spend 10 pounds on one meal when that could buy me like three. I'm not going to lie, there are definite times when I'll eat pasta, sauce, and shredded mozzarella cheese because it's cheap and easy. I also eat a lot of smoked salmon (right Austin) because that's also yummy. I've dabbled in other family recipes like chili or baked ziti because I can get the most meals out of those. However, the other day I was hungry and I wanted something new so I made up this recipe a la Casey. She's always just throwing things together and it looks so yummy. I chose a slightly simpler route since my recipe only has four ingredients, and three of them are proteins. I'm sure it's not healthy for you, but it's delicious and easy and I feel pretty chic. So here it is Eggs Bloomsbury!

I'm not the biggest breakfast fan. I do the bad thing of skipping breakfast more times than not. When I do eat it,  I prefer savory dishes like Eggs Benedict. I don't mean to brag, but my Pops makes a mean Hollindaise sauce that is so yummy. I didn't have the resources for that so here's what I used:

1 Slice of Toasted Bread
Goat Cheese
1 Slice of Salami
1 Poached Egg

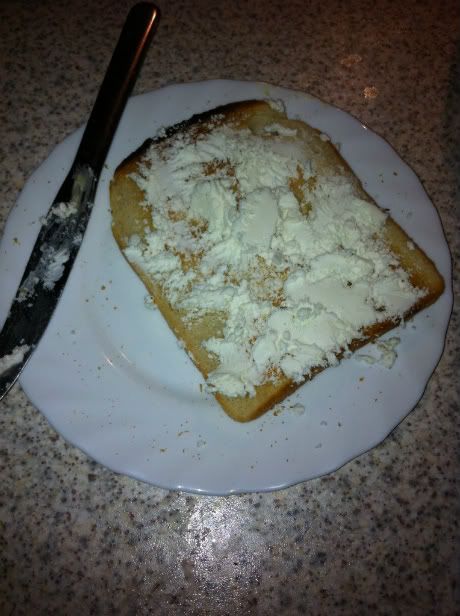
First toast the bread and cover it with spreadable goat cheese like so:


I was torn between cheeses for this because I also had a yummy Halloumi as well, but I went for this since it was easier to spread and has a tangier taste as opposed to the salty (but delicious) Halloumi.


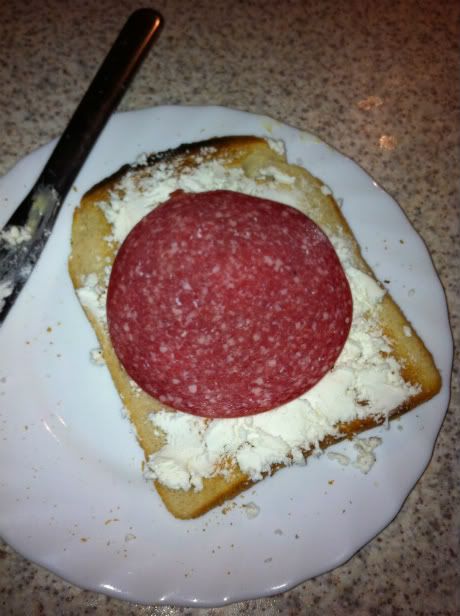
Then add your piece of salami. Again, this was something I just had hanging around so you could probably use any sort of lunch meat on hand. The salami added a really nice subtle smokey flavor which I quite enjoyed.


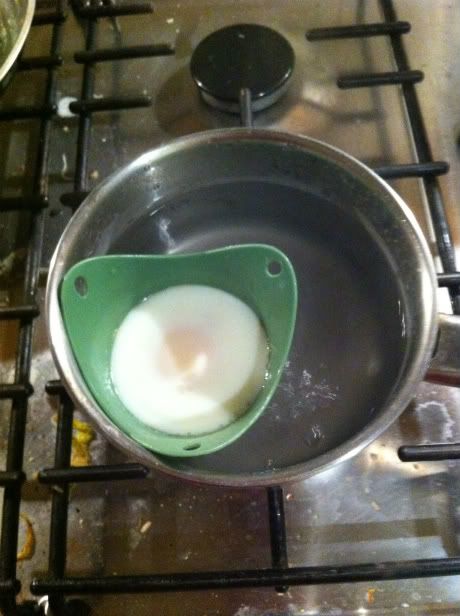
At the same time (or before/after your bread/salami step) poach your egg. Back home we have this uber fancy egg poaching pan thing. I do not have such luxuries abroad, but the other day I was in Sainsbury's and came across these little poaching pods. They are amazing. I love a good poached egg and after some practice I got the technique down. I'm sure they sell something like these in the States so you should look into it.


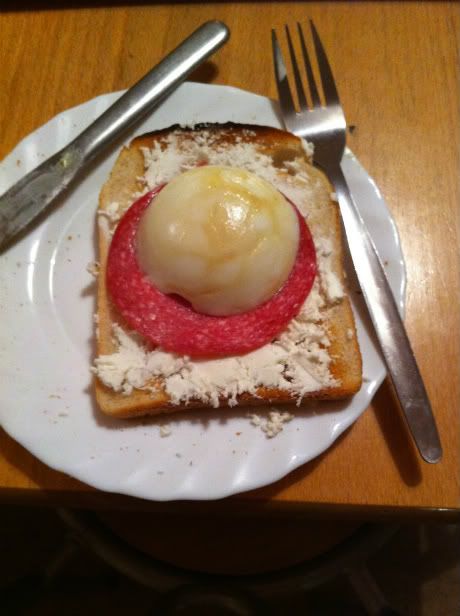
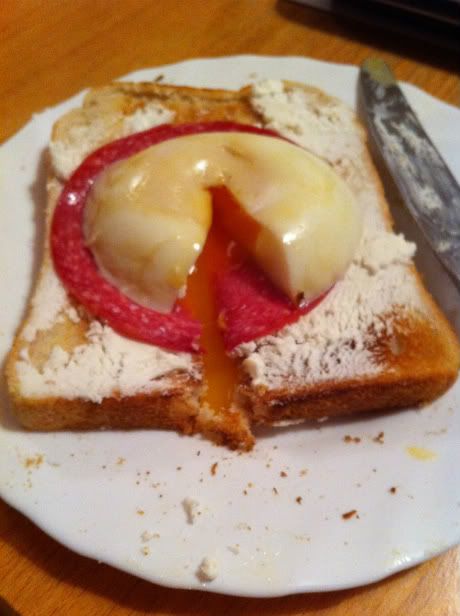
After the egg is poached to your liking (I like mine very runny so I can sop up the the yolk with my bread) flip it over on the top and enjoy! It doesn't look like much, but it is delicious! The cheese adds a familiar tang like the Hollandaise sauce but is much easier to make. I decided on the name since it is a complete rip off from Eggs Benedict. We live right by Bloomsbury so I thought it only fitting to adopt the name. And it makes total sense! It is the quintessential I-don't-want-to-spend-money-on-food-because-I'm-studying-abroad-but-I-got-to-eat food. I have one egg left and I just might go and make another one. If you try it out tell me what you think!


Friday, March 9, 2012

Guess What I Made...


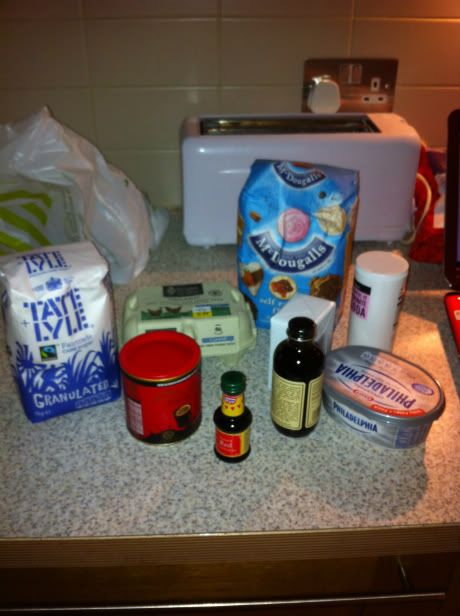
What could these ingredients mean? That's right boys and girls, I baked a cake. From scratch. Yesterday was Casey's 21st birthdays (warning, there are a lot of birthdays this month) and for my gift to her I thought I would try to make her favorite cake: Red Velvet with Cream Cheese frosting. Normally I would just go to the store and pick up a Red Velvet cake mix and that would be it, but apparently Red Velvet is an American construct so I had to find a recipe on line and buy all of the ingredients. I don't think I've ever made a cake from scratch before. It actually went pretty well. The only really hard thing here is that everything's in the metric system, and we didn't have any real measuring cups/spoons. I couldn't find any in the stores either so I did my best. Our kitchen also only has one working light now so it's quite dark which adds for a whole new set of challenges. I think it turned out pretty well. It wasn't quite Red Velvet (I might have put in too much cocoa powder) but it was fluffy and tasty. I think the fluff comes from a little science experiment I was told to put in by combining vinegar with a little bicarbonate of soda (baking soda) to get it all bubbly. Melissa was in charge of the icing and I thought she did a great job. I made two cakes and I think they both got eaten. So happy birthday Casey!!

The party was a lot of fun. There were about 30 people in our little flat and it was themed as a typical College Party. And not just any college party, but one where the music was all from the late 90s early 2000s. It was fun to reminisce about some of the stuff that we used to boogie to in 8th grade. "Stacey's Mom?" "Beverly Hills?" "I'm Blue?" "My Heart Will Go On?" It was just a lot of fun. I"m not much of a party-er back home and I think this was the first time I had a genuinely good time at one. Although it was completely Casey's night, it definitely got me excited for the possibilities of what my birthday might hold.
Thursday, December 15, 2011

Sweet Potato Latkes (Potato Pancakes)


So I went to a friend's holiday party last Monday and decided that it was the opportune time to stretch my culinary tendons. I wanted to make something salty and something sweet so I decided on my family's recipe of sweet potato latkes (I don't like calling them potato pancakes) and those little pretzels with chocolate kisses with an m&m in the middle. I assumed it was going to be more of a Christmas fling (which is fine) but I have a Jewish friend who was going to there and we got talking about the holidays and how much we both miss our family's latkes. Diversity's always good right? I decided to call my family and they sent me up a super easy recipe. We usually do regular potato latkes because its easier to make them in large quantities since we usually have large gatherings around Hanukkah, but a couple of years ago we used sweet potatoes instead and I almost liked them more. Don;t get me wrong, I love a dollop of sour cream and applesauce on these fried goodies, but with the sweet potato, they really don't need a garnish. And they're so easy to make whether you have an actual home or are stuck in a small dorm kitchen like me. So let's get started shall we?


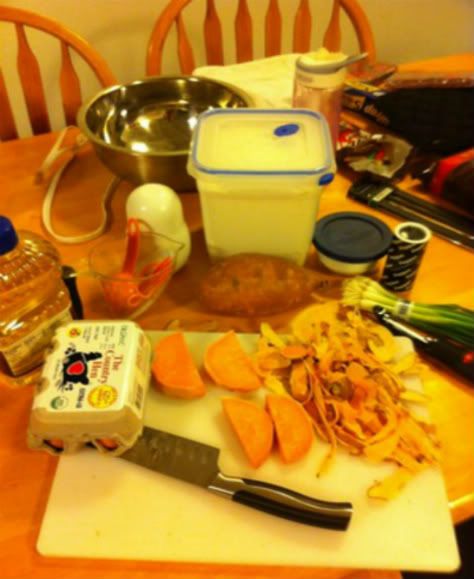
For a single batch, which will make about 26 full size latkes, you will need:

1 lb of sweet potatoes (warning this is only like one potato and seems like nothing, but you should be fine)
2 scallions
1/3 cup of all-purpose flour
2 large eggs
1 tsp of salt
1/2 tsp of black pepper
3/4 cup of vegetable oil

I made about a double batch because I was making it for a party. I also made them more bite-size so they were more like a finger food then something you would need a fork and knife for
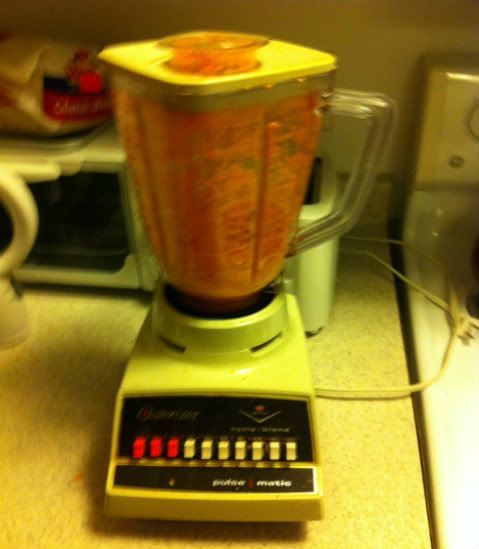
You need to peel and loosely grate your sweet potatoes. This was the only thing that took me some time because I originally thought I owned one of those big pyramid graters, but after an incident last year involving my toes meeting the grater in a bloody battle, I must have thrown it out. Instead I used the only other thing I could think of: a blender circa 1990.


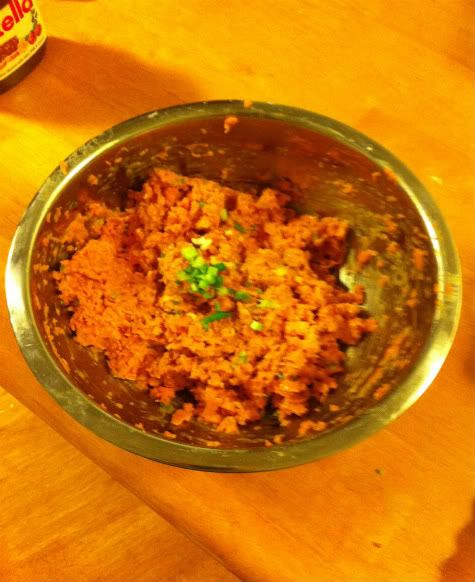
I kept on having to stop and start the blender because certain chunks wouldn't break up. If you had a Cuisinart or something fancy like that that would also work very well. You just want it to be in grated strips without huge chunks. After grating the sweet potatoes, add your finely chopped scallions (there is tons of info about what part of the scallion to chop in case you are a newbie), flour, slightly beaten eggs, salt, and pepper into a bowl and mix it all together. I used my hands because I thought it would be the most fun. I found myself adding more flour because the mixture was too wet. It should be moist so that it can stick together to form the cakes, but not so that it seems to heavy. You're going to have to use your judgement here, but I found when in doubt, stop adding flour. I also really like scallions so I added more of them to add more flavor, but again, that's all about personal preference. You're mixture should look something like this.


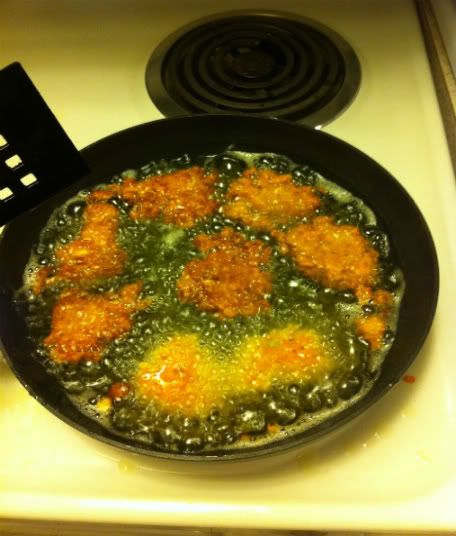
The last step is to fry that goodness up. Take a large, preferable deep, frying pan and poor your oil in. You want to heat it up until the oil is hot, but not smoking. You can test how hot your oil is by making a little cake of the potato mixture and seeing if it sizzles when it hits the oil (newsflash: it should). I used like a dinner spoon, but others use like a cookie scoop to measure how much you want. The size doesn't really matter as long as its uniform to the rest of them. Once you carefully drop them into the oil (don't burn yourself please) flatten them with a slotted spatula so that they are more disc-like in appearance. From the picture below you can see that not all of mine turned out circular, but they were still delicious.


Wait for like a minute and then carefully flip them over to the other side until both sides are golden brown. My first couple ones were too burnt so I lowered the temperature and just threw those out. This is really all about trial and error until you get into the groove. Near the end of cooking I could get like six small latkes in the pan at once. Once both sides are all goldeny, take them out of the oil and place them on a plate with a paper towel to drain the excess oil. I then transferred them to a different plate and tented lightly with foil to keep the heat in. These are wonderful, but they tend to loose their heat very quickly so it's best to make them and serve them immediately.I was in such a hurry to get to the party without these cooling that I forgot to take a picture of my finished product (sorry). I sprinkled a little salt on the top of mine to take them across campus. I forgot to buy sour cream but I did have a jar of applesauce from back home in Pennsylvania. These go great with one, the other, or even both (how scandalous!). These are a great side dish and really just remind me of the massive Hanukkah parties we used to throw when I was younger.  Like I said, these are easy and so good. Let me know if you make them or have any questions I didn't explain things clearly enough.


P.S.- If you couldn't tell from the crappy quality, but all the pictures, except the first one, were taken from my iPhone.
 

Blog Template by BloggerCandy.com